Pretty soon we won't need this page, Rich at Reptile Basics has a new flexwatt that is super easy to wire, all you need is a hole punch and some rivets for the new stuff, pretty cool!
So you want to wire flexwatt?
Believe it or not, it's rather simple! I've made an easy guide with lots of pictures to help explain what I'm doing.
Step 1
The supplies: flexwatt, wire stripper/cutter, electrical tape, soldering iron, extension cord, soldering wire, optional=aluminum tape.
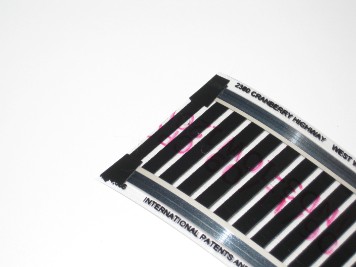
Make sure if you are making a rack system that you stay with the same size and wattage of flexwatt. I use 3 inch flexwatt, 3 feet long, and 10 watts/foot. It's important to keep them equal in length, width, and wattage. If you don't, your temperatures will fluctuate quite a bit. 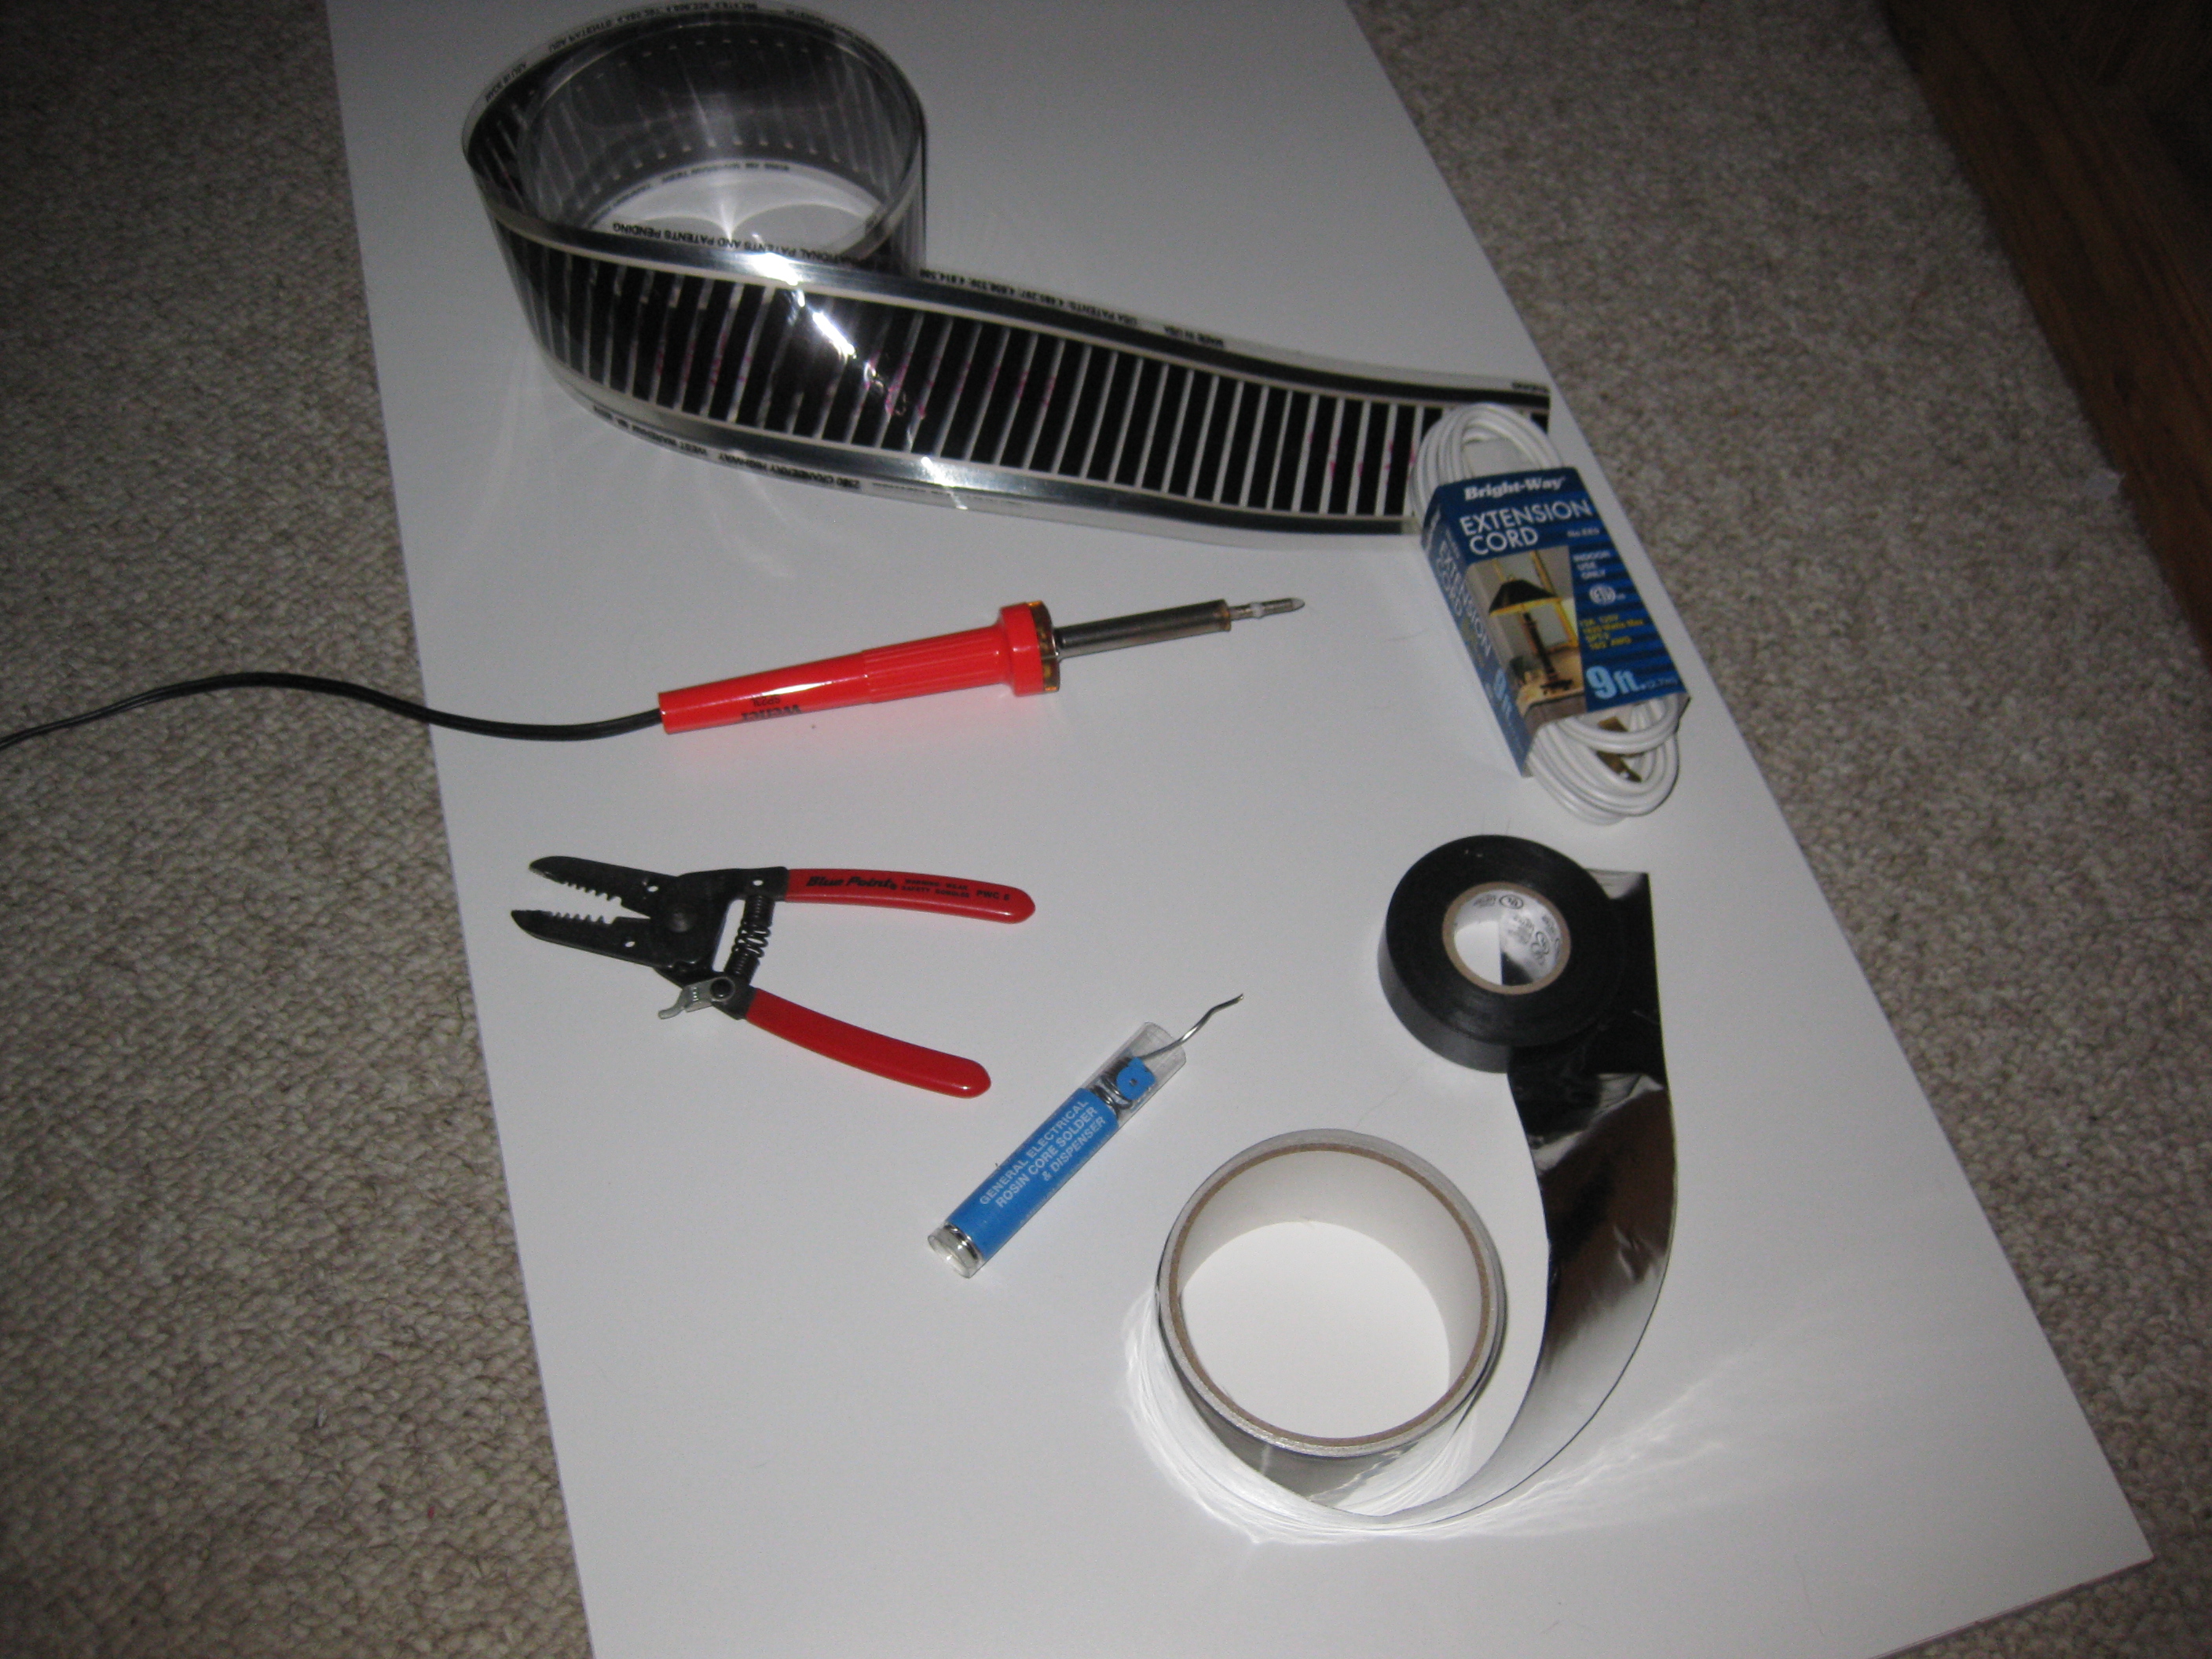
***If you need to cut the flexwatt down to size DO NOT cut the black heat elements that run up and down between the sliver electrical strips.
***you'll probably have to order flexwatt online, I suggest buying it from a business so when you need more you know it's the exact same flexwatt. Most people have no idea what flexwatt is, that include stores that supply contract electrical workers-I've looked there.
***to use flexwatt you MUST use a thermostat or some sort of temperature controlling devise. If you don't you might as well put your snakes in the oven. Flexwatt by itself gets far too hot and will cook your snakes. I also suggest using a dimmer with a thermostat or another thermostat as a back up. Cheap thermostats can be very dangerous, and even the really nice thermostats could break. I explain at the bottom how to use a thermostat and a dimmer together.
Step 2
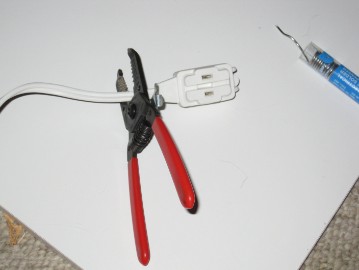
Clip the "female" end of the extension cord off, you won't need it. Then pull the two extension wires apart.
Step 3
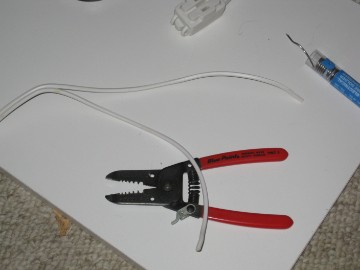
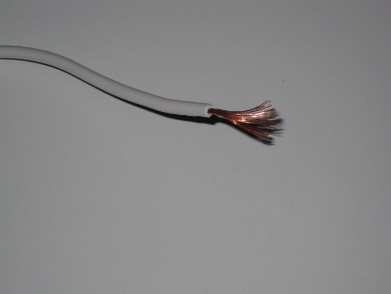
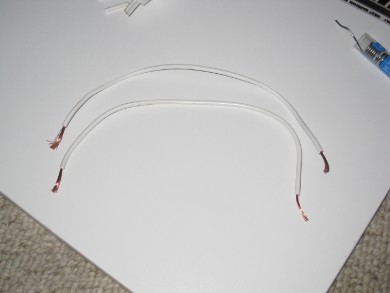
Strip the plastic coating off the wire so you expose the copper wire inside. *Do this to both ends of both wires.
*only do this if you are connecting racks, otherwise only cut one end of both wires so you can plug the extension cord into your thermostat.
Step 4
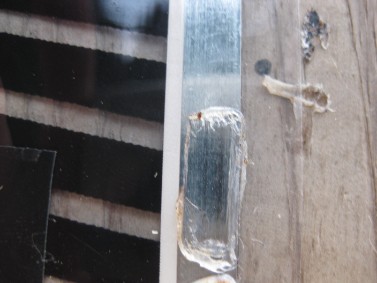
Now you need to wire your flexwatt! To do this you need to first expose the metal strip by melting the plastic covering them. Melt just enough to solder your wires to the strip. Be patient! I had to redo one side because I didn't wait for the soldering iron to heat up-I'm an impatient soul.
Once you've got that done it's time to do some actual soldering!!! It's relatively easy, and it doesn't need to be pretty, it just needs to make a connection and hold your wires on.
***I suggest soldering on something that won't matter if it gets burnt, a soldering iron can reach 550 degrees or more!
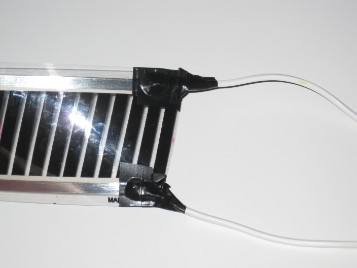
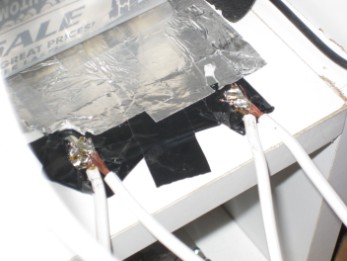
Step 5
Here's where your electrical tape comes in. You need to cover your soldering to prevent getting shocked or starting a fire, and to help hold your soldering in place. You also need to cover the other end of the flexwatt where the two silver electrical strips are exposed.
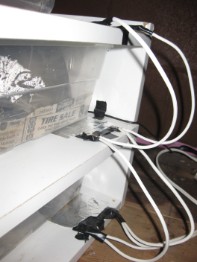
Step 6
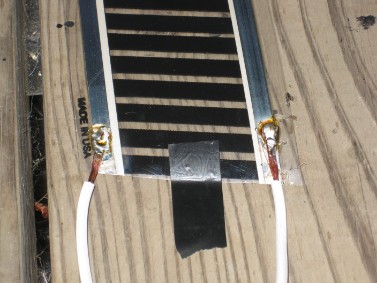
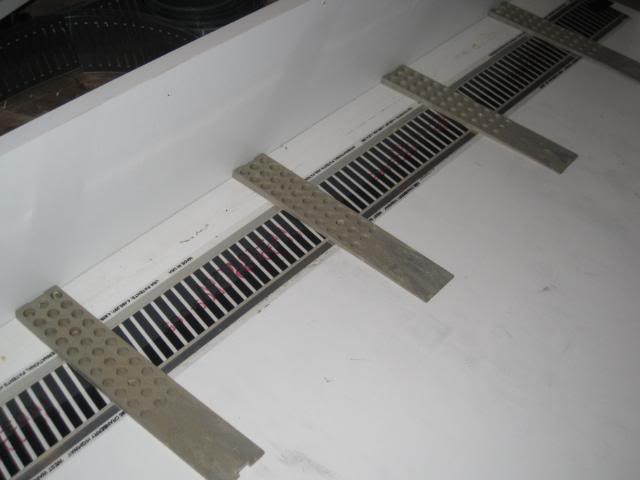
To connect your racks you need to solder your flexwatts together. Do not crisscross your wires, you want the right side of the flexwatt on top wired to the right side of the flexwatt below it, and so on... You can see this in the second picture. The bottom rack flexwatt is connected to the middle rack and also has the plug-in part of the extension cord which is plugged into the thermostat.
***Don't forget to cover your solder with electrical tape!
Step 6.5 (optional)
Tape down your flexwatt with aluminum tape. This will help even out the temperatures and hold your flexwatt to the rack. Don't mess up with this tape, you have one shot to get it right, it's STICKY!!!
Make sure your tubs aren't sliding on your flexwatt!
I thought the "feet" on the tubs would be enough to save my flexwatt, but after I received electroshock therapy I thought differently. After walking around a home improvement store I found it! Composite window shims! It was $1.49 for 12 shims.
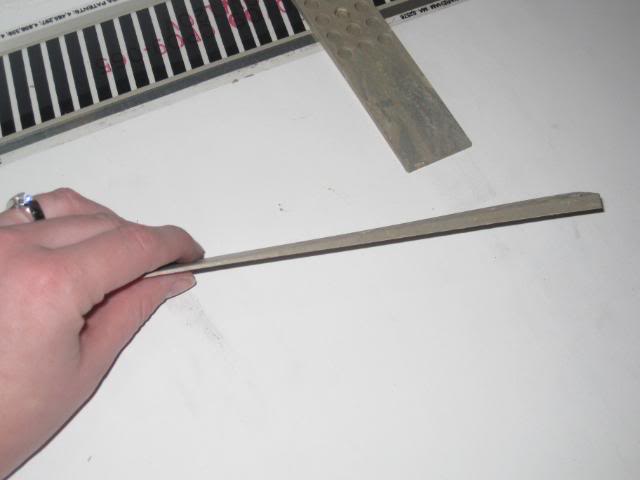
I spaced them apart so that both shoebox sized tubs and adult tubs wouldn't touch the flexwatt at all.
I didn't use aluminum tape when I re-made my rack. It wasn't really because I didn't like it or don't believe in it, it was just easier to leave it out. I have heard some theories on aluminum tape like: your flexwatt can't breathe if you put tape over it. Well, it's completely covered with plastic so I don't know how it could "breathe" in the first place, but whatever. The tape is good for taping down, which isn't needed if you screw the shims down (don't screw through the flexwatt!!!).
Using a Thermostat and Dimmer:
I had a scare with a cheap thermostat and could have lost all of my snakes! Thank heavens a friend of mine told me I should get a dimmer just in case and boy was a I glad I took his advice when I went downstairs to find my melted thermostat!!!
How to set it up:
First I plugged the flexwatt into the dimmer and let it run for a
little bit adjusting it to where I liked the temp, and I set it just a tad
hotter than I wanted it. To put all three together, you need to plug the flexwatt into the dimmer, the dimmer into the thermostat, and the thermostat into the wall. Just think about it this way, you don't want to decrease the amount of power going to the dimmer, you want to decrease the amount of energy allowed to flow into the dimmer if the thermostat fails. This way, if the thermostat went hay wire my dimmer would
stop the 100% power to the flexwatt. When a thermostat breaks it runs
at full power, when a dimmer breaks it cuts the power.